Tracking discount link revenue in Shopify involves attributing sales to specific discount URLs using UTM parameters, marketing campaign associations, and native Shopify Analytics reports. Shopify now automates much of this process through built-in campaign integration, which automatically tags shareable discount links with UTM data. The result is cleaner attribution, faster decisions, and a clearer picture of which promotions actually drive revenue. This guide walks you through native Shopify features, manual UTM construction, common data pitfalls, and a repeatable workflow for measuring and improving every discount campaign you run.
How do you track discount link revenue on Shopify natively?
Shopify’s native marketing campaign association is the fastest way to connect a discount code to measurable revenue data. You access it directly from the discount code page in your Shopify admin. Shopify automates UTM tagging of discount shareable links when you associate them with a marketing campaign, removing the need to build tracking URLs by hand.
Here is how to set it up:
- Go to your Shopify admin and open Discounts.
- Select or create a discount code.
- Click Promote, then choose Get a shareable link.
- Select an existing marketing campaign or create a new one.
- Shopify generates a URL with UTM parameters already appended, including
utm_source,utm_medium, andutm_campaign. - Copy the link and share it across your email, social, or paid channels.
Once a customer clicks the link and completes a purchase, Shopify logs the session data against that campaign. You can then view performance directly inside Shopify Analytics under Marketing reports. Automating discount tracking through this feature reduces manual errors and speeds up campaign optimization decisions significantly.
Pro Tip: Create a separate marketing campaign for each channel where you share the discount. One campaign for email, one for Instagram, one for influencer posts. That separation gives you channel-level revenue data without any extra tagging work.

How to build Shopify discount URLs with UTM parameters manually
Manual UTM construction gives you granular control that goes beyond what Shopify’s native campaign tool offers. You can attribute revenue to a specific influencer, a single ad creative, or even a day-of-week promotion. The foundation is the standard Shopify discount URL format: yourstore.com/checkout?discount=CODE.
From there, you append UTM parameters using standard URL syntax:
- utm_source: the traffic origin, such as
instagram,email, ornewsletter - utm_medium: the channel type, such as
social,cpc, oraffiliate - utm_campaign: the campaign name, such as
summer_sale_2026 - utm_content: the specific creative or link variant, useful for A/B testing
- utm_term: optional keyword or audience segment identifier
The syntax rule is simple. If the base URL already contains a ?, add each new parameter with &. If there is no ? yet, start with ? before the first parameter. A correctly built URL looks like this: yourstore.com/checkout?discount=SUMMER20&utm_source=instagram&utm_medium=social&utm_campaign=summer_sale_2026. Custom UTM parameters appended to Shopify discount URLs stay fully compatible with Shopify checkout flows.
| UTM Parameter | Purpose | Example Value |
|---|---|---|
| utm_source | Traffic origin | instagram, email, tiktok |
| utm_medium | Channel type | social, cpc, affiliate |
| utm_campaign | Campaign name | summer_sale_2026 |
| utm_content | Creative or link variant | banner_v1, bio_link |
Pro Tip: Use a free UTM builder to generate these URLs without typos. A single character error in a UTM string breaks attribution for every click that follows.
What are common mistakes when measuring discount link revenue?
The most damaging mistake Shopify merchants make is using the Compare at Price field as a discount mechanism. Compare at Price is display-only and does not register discount costs in Shopify Analytics. Your gross sales figures look inflated, your ROI calculations are wrong, and you cannot measure the actual cost of the promotion. Real discounts applied at checkout are the only type Shopify’s native reporting tracks accurately.
A second major error is sharing one generic discount code across multiple channels without unique UTM parameters. When SAVE20 appears in your email, on Instagram, and in an influencer post, Shopify cannot tell you which channel drove the sale. Marketing experts confirm that failing to link discount codes uniquely to marketing channels makes accurate ROI measurement impossible.
Tracking only the discount redemption is not enough. You need full-funnel attribution: from ad spend or send through the click to discount code usage, and finally to completed checkout. Incomplete attribution leads to misleading conclusions about which campaigns are worth repeating.
Other pitfalls to avoid:
- Manual spreadsheet tracking: Error-prone and slow. It breaks down the moment campaign volume increases.
- Reusing discount codes across campaigns: Contaminates historical data and makes period-over-period comparisons unreliable.
- Ignoring post-purchase behavior: A discount that drives first-time buyers with high repeat purchase rates is worth far more than one that attracts one-time shoppers.
Full-funnel attribution from ad spend through checkout redemption is the only method that gives you an accurate read on promotional ROI.
How to use Shopify Analytics to monitor discount link performance
Shopify Analytics holds more discount reporting power than most merchants use. The key report is Sales by discount, found under Analytics > Reports > Sales. This report shows you total revenue, order count, and average order value broken down by discount code. You can filter it by date range, product, or traffic source to answer specific questions about campaign performance.
Here is a practical workflow for reading discount reports:
- Open Analytics > Reports in your Shopify admin.
- Select Sales by discount from the Sales category.
- Set your date range to match the campaign period.
- Filter by a specific discount code to isolate one campaign’s revenue.
- Cross-reference with the Marketing report to see which UTM source drove the most redemptions.
Custom Shopify reports filtered by discount code let you answer questions like: Which campaign produced the highest revenue per click? Which discount drove the most repeat purchases? Which product collection converts best with a 15% offer versus a flat $10 off?
| Report Type | Key Metric | Business Question Answered |
|---|---|---|
| Sales by discount | Revenue per code | Which discount drove the most sales? |
| Marketing report | Sessions by UTM source | Which channel sent the most traffic? |
| Customer report | Repeat purchase rate | Did the discount attract loyal buyers? |
| Product report | Units sold per code | Which products moved most during the promo? |
The data from these reports feeds directly into your next campaign decision. If one channel consistently drives higher average order value, you allocate more budget there. If a discount code shows high redemption but low revenue, the offer may be attracting low-value orders.
What steps optimize discount link tracking and maximize promotional ROI?
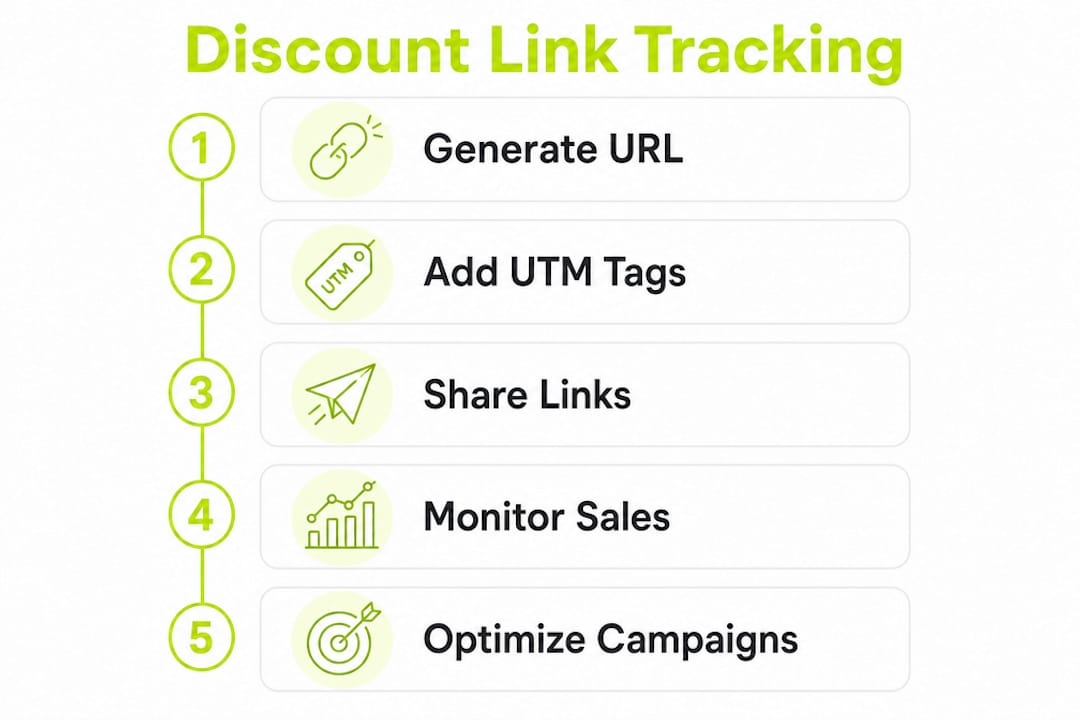
A repeatable tracking workflow prevents the data gaps that make campaign analysis unreliable. Follow these steps from setup through analysis:
- Create a unique discount code per campaign. Never reuse codes across channels or time periods.
- Build your discount URL with UTM parameters. Use Shopify’s native campaign tool or a UTM builder for accuracy.
- Associate the discount with a Shopify marketing campaign. This ties click data to revenue inside Shopify’s reports automatically.
- Distribute the link through your chosen channels. Email, social posts, influencer briefs, and paid ads each get their own UTM-tagged URL.
- Monitor performance weekly during the campaign. Check the Sales by discount report and the Marketing report together.
- Calculate ROI after the campaign closes. Calculating ROI requires comparing your baseline conversion rate without the discount against campaign performance during the promotion.
- Audit your data quarterly. Confirm UTM parameters are firing correctly and no codes have been shared outside their intended channel.
For influencer and affiliate campaigns, the tracking logic is the same but the distribution is different. Each creator gets a unique discount code and a unique UTM-tagged URL. This lets you measure full-funnel influencer impact from click through to revenue, not just engagement metrics. You can then rank creators by revenue generated, not just by follower count.
Pro Tip: Set a calendar reminder to audit your discount codes every 90 days. Check that no active codes are circulating on coupon aggregator sites without UTM parameters. Untagged redemptions create attribution gaps that distort your campaign data.
Balancing automation with periodic audits is the key discipline here. Shopify’s native campaign association handles the day-to-day tagging. Your job is to verify that the setup is correct and that the data you are reading reflects reality.
Key Takeaways
Accurate discount link tracking on Shopify requires unique codes, proper UTM parameters, and full-funnel attribution from click to checkout redemption.
| Point | Details |
|---|---|
| Use native campaign association | Shopify auto-adds UTM tags when you link discounts to marketing campaigns via Promote > Get a shareable link. |
| Build UTM URLs correctly | Append utm_source, utm_medium, and utm_campaign to every discount URL using proper ? and & syntax. |
| Avoid Compare at Price | This display-only feature does not log discount costs in Shopify Analytics, distorting your ROI data. |
| Read Sales by discount reports | Filter by code, date, and channel in Shopify Analytics to answer specific revenue and performance questions. |
| Calculate ROI with incrementality | Use the formula ROI = (Incremental Revenue − Discount Cost) / Discount Cost for accurate campaign measurement. |
Link Squeeze makes Shopify discount tracking more accurate
Native Shopify tracking solves attribution, and it tells you which discount code and channel drove a sale. What it doesn’t solve is what happens to everyone who clicks and doesn’t buy. That traffic is gone the moment they bounce, even though you already paid for it in discount margin, creator fees, or ad spend.
That’s the gap Link Squeeze fills: it turns the discount link itself into a retargeting asset, so every click builds a Meta, TikTok, or Pinterest audience, whether or not the person converts the first time.
If you run promotions on Shopify, you’ve probably shared the same discount in a dozen different places: an influencer’s bio, an email blast, a text campaign, a QR code on packaging. Each one uses the same raw Shopify URL or discount code, which means once the click happens, it’s gone. You know the code got used. You don’t know which link, channel, or partner actually earned the sale, and you definitely aren’t building an audience from everyone who clicked but didn’t buy.
That second part is the bigger miss. Every discount link you share is traffic you paid for (in discount margin, in creator fees, in ad spend), and most of it disappears the moment someone bounces.
Link Squeeze gives Shopify merchants a built-in UTM builder that generates clean, error-free tracking URLs in seconds. You can also create branded short links that replace long discount URLs with professional, memorable links that still carry full UTM data. Every click gets tracked, and retargeting pixels from Meta, TikTok, and Pinterest fire automatically on each link. That means your discount traffic builds retargeting audiences while driving sales. Merchants who want a cleaner, faster way to manage Shopify discount link tracking will find Link Squeeze reduces setup time and improves data accuracy across every campaign.
Turn the discount link itself into a retargeting asset
Link Squeeze installs directly from the Shopify App Store and turns any product, collection, or campaign URL into a branded short link with built-in retargeting pixels. The pixels fire the moment someone clicks, and before they’ve even landed on your store, so you’re building Meta, TikTok, Pinterest, or Google Ads audiences from every discount link you share, not just from people who reached your site.
Practically, that means:
- A branded short link replaces the raw URL. Instead of sharing a long Shopify link with a discount code tacked on, you share something like
yourbrand.link/summer26, this on your own custom domain. - Pixels fire on the click, not the landing. Someone taps your influencer’s discount link, bounces without buying, and you can still retarget them on Meta or TikTok, because the pixel already fired.
- Every link gets its own analytics. Clicks are tracked by country, device, browser, and referrer, so you can see exactly which campaign, channel, or creator is driving real traffic, not just which discount code was redeemed.
- One link per partner. Give each influencer or affiliate their own short link instead of a shared code, and you can compare their performance side by side in one dashboard.
- QR codes carry the same tracking. A discount on packaging or in-store signage can use a branded QR code that fires pixels and logs clicks exactly like a digital link would.
None of this replaces Shopify Analytics or Google Analytics. It sits alongside them as an extra layer that captures what happens at the moment of the click, which native analytics generally aren’t built to do.
Setting it up for a discount promotion
- Install the app from the Shopify App Store and add your existing Meta, TikTok, Pinterest, or Google Ads pixels.
- Create your discount in Shopify as usual.
- Generate a branded short link for each channel or partner, pointing to the discounted product or collection page.
- Share the short link, not the raw URL. Every click fires your pixels and logs to your dashboard in real time.
- Watch performance per link, and shift budget toward whichever channel or partner is actually converting.
- Retarget everyone who clicked but didn’t buy, using the audiences your pixels have quietly built since day one.
Why this matters more than it sounds like it should
Most Shopify merchants running discounts across several channels end up making budget decisions based on redemption counts alone, which tell you a code worked, but not where the traffic came from or what to do with everyone who clicked and left. Pixeling the link itself closes that gap: every discount promotion becomes a retargeting campaign by default, whether or not the person buys the first time.
FAQ
What is discount link revenue tracking on Shopify?
Discount link revenue tracking is the process of attributing completed sales to specific discount URLs using UTM parameters and Shopify’s marketing campaign reports. It tells you exactly which channel, campaign, or creator drove each discounted purchase.
How do I add UTM parameters to a Shopify discount URL?
Start with the base format yourstore.com/checkout?discount=CODE, then append UTM parameters using & before each one. For example: yourstore.com/checkout?discount=SAVE20&utm_source=email&utm_medium=newsletter.
Why does Compare at Price distort my Shopify discount analytics?
Compare at Price is a display-only field and does not register in Shopify’s discount or revenue reports. Only discounts applied at checkout are logged, so using Compare at Price as a promotion method creates a gap between what customers see and what your analytics record.
Can I track affiliate and influencer discount links in Shopify?
Yes. Assign each affiliate or influencer a unique discount code and a UTM-tagged URL. Shopify’s Sales by discount report then shows revenue per code, and the Marketing report shows traffic by UTM source, giving you full attribution per creator.
What is the formula for calculating discount ROI in Shopify?
The formula is ROI = (Incremental Revenue − Discount Cost) / Discount Cost. Incremental revenue is the additional sales generated above your baseline conversion rate during the campaign period.